
After graduating from college I, like so many grads before me, find myself back home at my parents house. I love my family and being home but taking all of my college stuff and fitting it back into a room I haven’t truly lives in for four years is difficult. I got sick of living out of bins, laundry baskets, and reusable Marshalls bags so for me this cute rope basket was a perfect solution.
Supplies Needed
- Plastic basket the size of your choosing
- Rope thickness once again of your choosing
- Hot Glue
- Muslin Fabric
- PATIENCE (which is something I do not have a coupon for)
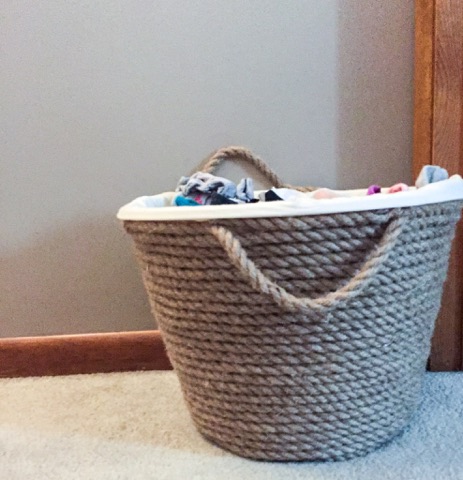
I found this project on pintrest and it was in shopping for this project that I learned that even if you really want to follow the instructions to a T it is not always possible. I was on the look out for the amount of rope I needed in the perfect thickness and a laundry basket exactly the same as the one from my pin. Although it may be somewhat easier to order online I had the day off and was determined to make the most of it by making this basket, so waiting for supplies to ship was not an option for me, I was on a mission. What I needed to do was to accept the fact that my project was not going to be perfect and exactly match the one I had pinned which can be easier said than done. My rope was thicker my basket not as tall but I was determined to make it work, and I like to think that I did! There were a few hiccups along the way, I did not buy enough fabric and my rope was a little lop sided but to me its perfect. I took the template of the pin and made it my own. I added handles for my own little bit of flair and overall for one afternoons worth of work I am very proud of the outcome! I now have a cute little basket and am one step closet to creating a room fit for an adult!
Here is the Pin that originally gave me the idea!
https://lydioutloud.com/diy-metallic-rope-throw-basket/

